In the previous section of this guide, we coveredHow to Find the Rum Bottle Spyglass. This section will continue into the next part of the Tall Tale and explain how to use the Rum Bottle Spyglass to locate the additional notes and the Gunpowder Key. Further down, we will also provide the exact locations of each key and links to videos that show you exactly how to reach each platform.
Sea of Thieves | Art of the Trickster Tall Tale | Trapmaker’s Gunpowder Key Riddles Guide and Locations
Before we begin, to do this part of the adventure, you will first need to obtain the Rum Bottle Spyglass. If you haven’t done that, you can find the link to that guide section listed below. Alternatively, if you have already found the Trapmaker’s Gunpowder Key, you can use the list below to skip to other sections of the guide.
If you’re still reading, that means that you are certain you’re looking for the Trapmaker’s Gunpowder Key. If you were hoping to solve the riddles yourself and simply look for guidance on using the Rum Bottle Spyglass, continue reading intoStep One -Option Onebelow. If, instead, you were looking for the exact locations and a guide to each possible riddle, you may find those below inStep One -Option Two.

Related:Sea of Thieves Fishing Guide: How to Catch and Sell Fish - Pro Game Guides
Step One - Option One: How to Solve the Riddles on Your Own
So, you’ve obtained the Spyglass and aren’t exactly sure what to do with it. The first and most important thing to note is which island the new notes tell you to go. This will be one of two options: Plunder Valley or Discovery Ridge. This Tall Thankfully, this Tall Tale doesn’t require as much sailing as the other ones, but that doesn’t mean it’s any easier! Head to the island mentioned in the notes, and be ready for a new type of riddle.
In case you haven’t noticed, the Rum Bottle Spyglass is unique in that, upon looking through it, it shows the shape of a skull and anXthrough its lens. ThisXis a crucial factor, as it will tell you where to dig when you’re looking at the correct spot.Finding the correct spot is the trickiest part, but none-too-clever for the tricky Trapmaker.
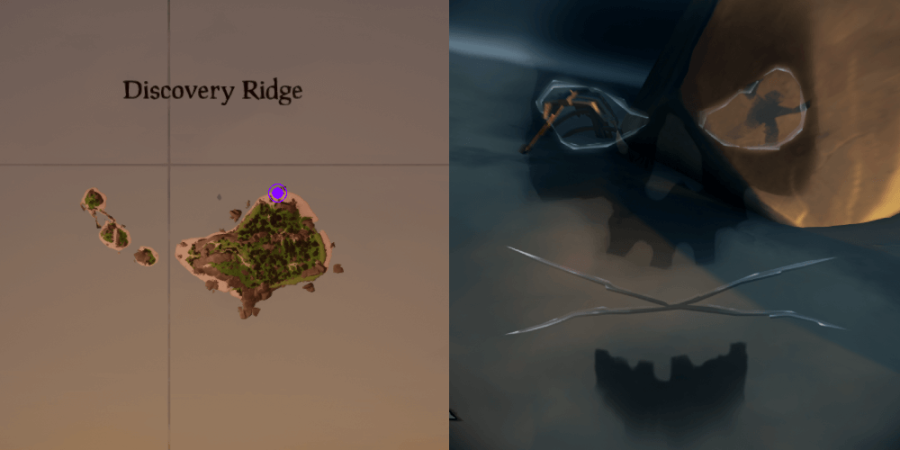
To find where you’re supposed to look, you’ll first need to be looking for the Trapmaker Spots littered throughout Discovery Ridge and Plunder Valley. These Trapmaker Spots are white paintings on boards or rocks formed like a skull with three points above it. So now, the question is:howdo you find those points?
Well, that’s where the bad news comes in. If you were hoping to do this without spoilers, you have to do a lot of exploring and figure out where the spots are based on the map provided in the Quest Book pages. However, listed below are helpful tips to keep in mind when searching for these Trapmaker Spots.
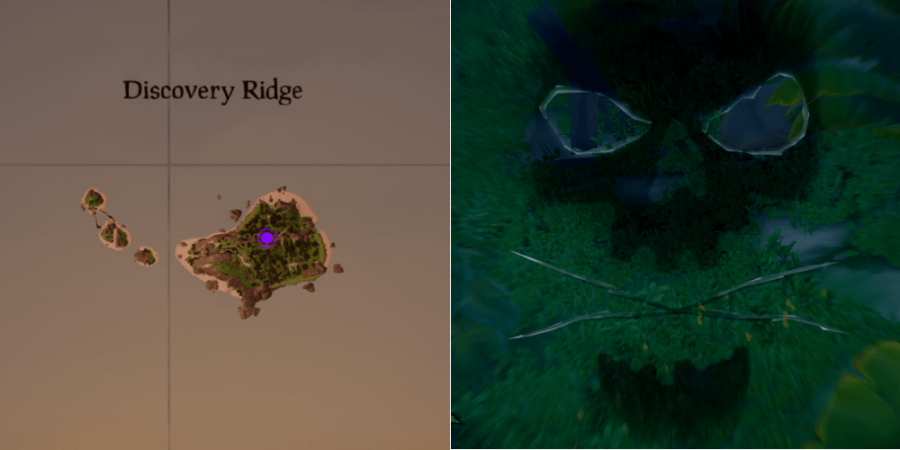
Once you’ve (hopefully) found the Trapmaker Spot, you’ll need to look through the Rum Bottle Spyglass in the direction that the painting is oriented. You will need tomatch the eyes with landmarks that are reflected in the words of the riddle.For example, if the riddle saysCaged inside a kind of brig, near broken urn a place to dig, you will need to match the eyes with a cage and a broken urn.
When you match the eyes with the landmarks, theXon the skull will show you where to dig.You will need to do this three times. The first two times you do it, you’ll uncover Trapmaker Notes, and the last time you do it, you’ll dig up the Trapmaker’s Gunpowder Key!
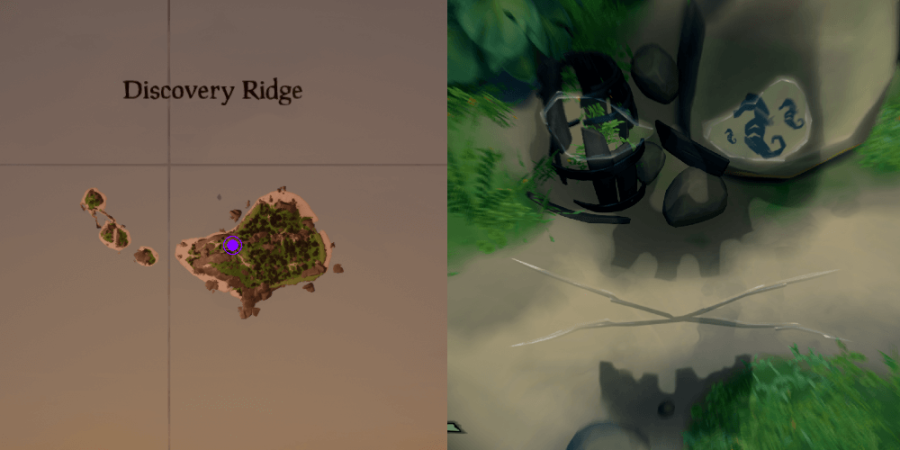
This all might seem simple, but with the variety of Trapmaker Spots and the vagueness of the riddles, you might end up getting confused! If you can’t find exactly where to look, continue readingOption Twobelow for the precise locations and video guides.
Step One - Option Two: Each Trapmaker Spot’s Precise Locations
To make this easy, we have separated these by island and by riddle in alphabetical order. The videos provided show you exactly how to get to each island, or you can follow the images and basic descriptions for each spot.
Related:All Beacon Locations in Sea of Thieves - Pro Game Guides
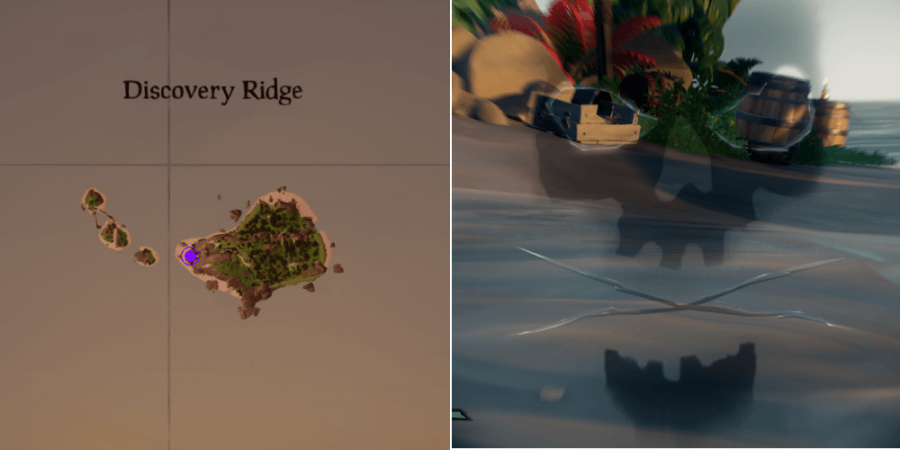
Discovery Ridge Trapmaker Spots
Ancient people praise the sea, in ships they used a fabled key
Deck and helm where once I stood, by stone now turned to drifting wood
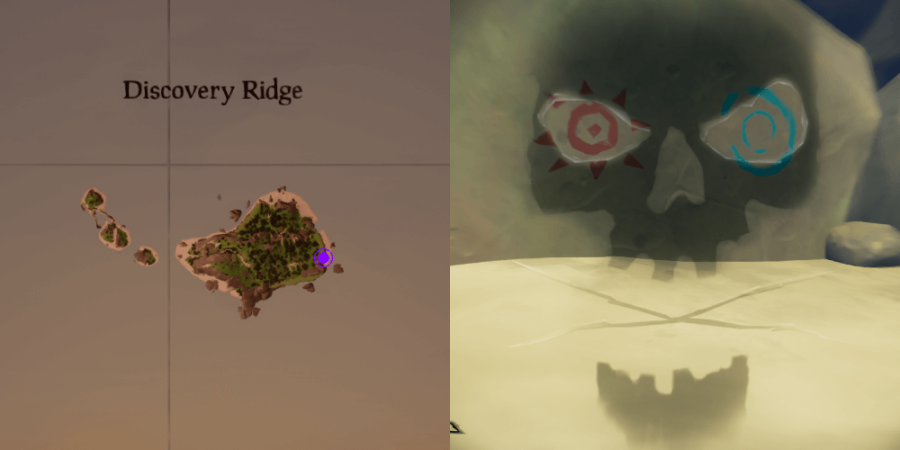
Plundered supplies help my plight, friends of the sea fill my sight
Salvage and supplies steel my nerve, for gold and greed I have to serve
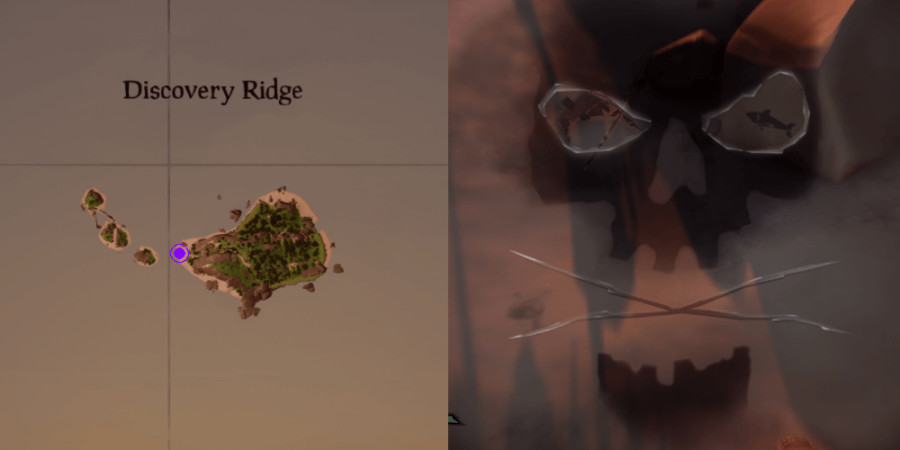
The red sun rises gifting light, the blue moon shines bright at night
Through island waters I rowed in awe, spited by a fearsome jaw
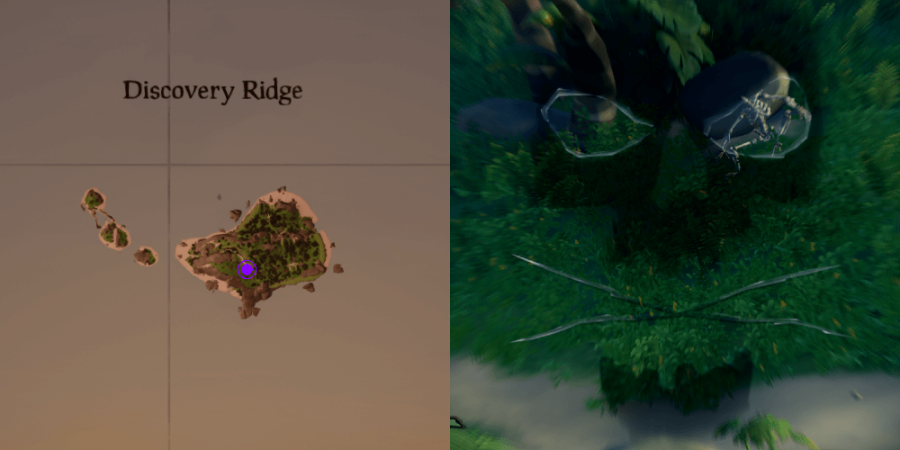
Through leafy palms I stumble and tread, through rum and greed I lost my head
Plunder Valley Trapmaker Spots
Caged and trapped I may be bound, near ancient urn within the ground
Caged inside a kind of brig, near broken urn a place to dig
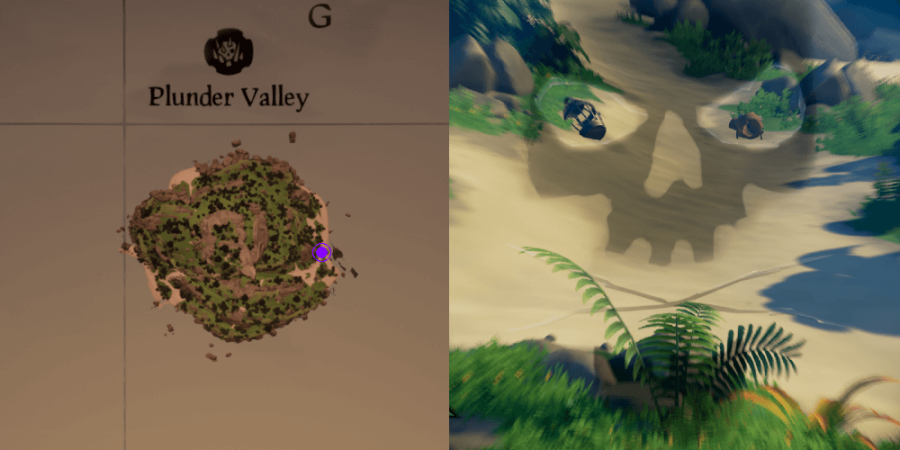
Crossed the seas now lost for days, I feel a red piercing gaze
Dark creatures now awake, an ancient call for all our sake
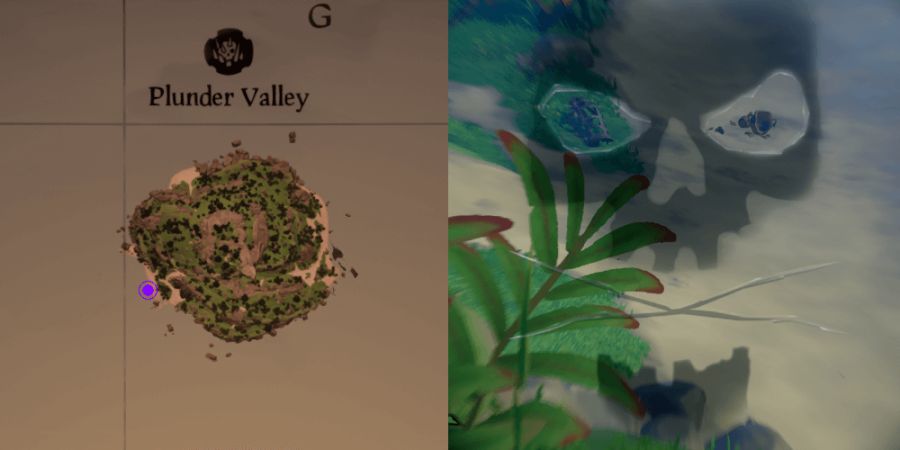
For forgotten people long we scour, in search of an ancient glowing power
Once soaring through the sky with pride, now crawling in the earth to hide
Rum and gold drown my grief, ferried for an accused thief
Rum and sea forever my fate, iron serves a fiery hate
Salvage and wood to batten down hatches, closer now if viewpoint matches
Wood and iron may be the tools, to save my soul from greedy fools
What’s Next
After finding three of the Trapmaker’s dig spots, you will have uncovered the Gunpowder Key. This looks like an explosive barrel but is actually a weight that you must place on a stand on Sailor’s Bounty. We’ll cover that in the guide’s next section:Sailor’s Bounty Traps and Battle Guide!
Have you gotten the commendation for completing The Cursed Rogue five times? Since it’s different each time,use our guide to help you!