OurArchero Chapter 2 Guidewill walk you through some tips and tricks that should help you complete this stage and all its levels in the game. The second chapter in the game is actually not too terrible, and if you got through the first chapter, then you’ll likely be pretty much prepared for the second. However, if you are struggling, particularly with the Tornado boss, we’ve got some pretty extensive details on the level to get you through!
Archero Chapter 2: General Tips & Ability Choices
Ability Choices
You are going to just pick the pretty standard stuff from thetier listfor chapter 2. Ricochet, Multishot, Front Arrow, Bouncy Arrow, Piercing (if you aren’t using Tornado), Diagonal Arrows, Attack Boost, Attack Speed Boost, Crit Master, HP Boost, and Blaze are your primary targets.
Archero Chapter 2: Boss Tips
Big Hiding Plant
This is a much larger version of the big hider plants that are mentioned in the enemy tips section. It’s brown, burrows, fires red projectiles, and fiery balls of flame! The easiest one to avoid is the fireballs it launches at you, they are slow moving and you just need to be ready to move immediately when you see them coming. You’ll need to move a fair bit, because they have a relatively large explosive area and it leaves fire behind as a hazard!
The other thing this big plant does is fires off kind of a lob of multiple red projectiles. To dodge this one, you’ll kind of need to look for a hole in the mass of random projectiles and position yourself into it. You’ll also want to stay pretty far away from the monster, because it spreads out a bit more as it travels, this gives you time to maneuver your way into a safe spot.

The third attack is just a four shot of red projectiles that go to the left, center, and right. Just stay further away from him, and then find the hole in the projectiles so you can dodge it.
If you want to really cheese this boss, you can just literally run right into it and sit there next to it attacking. The boss won’t be able to hit you, and you don’t take damage from touching it. This makes this boss very easy to kill!

Red Spider Boss
If you remember the red owl boss from the first chapter, then the spider boss is very similar. You mostly just attack it while it moves around, and once you’ve done enough damage to it, it will split into multiple spiders. The boss will randomly fire out red projectiles all-around it, but if you keep your distance they should be pretty easy to avoid. Any of the AOE styled abilities are good against it, especially Ricochet which is one of the best. When the spiders get smaller, each one of them can fire off projectiles, so be careful if they fire all at the same time!
Big Tornado Skeleton
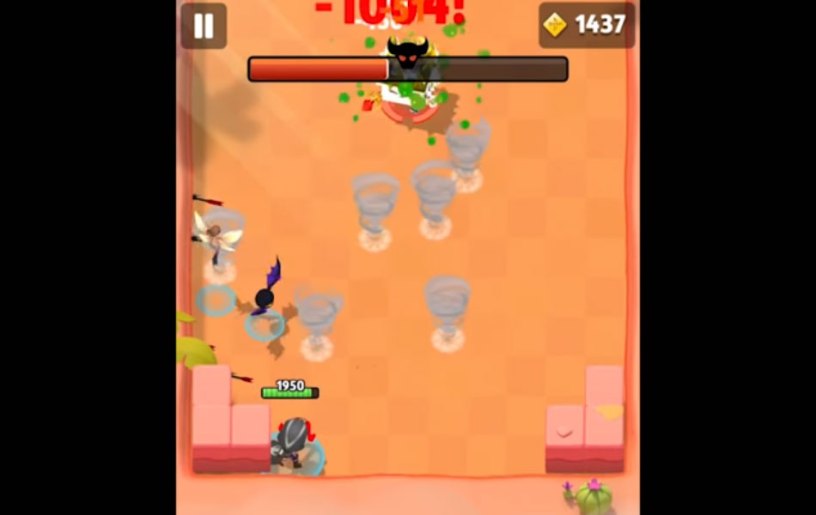
One of the hardest bosses in the chapter if you don’t know the trick to him. It launches a ton of those annoying tornadoes that go left and right while kind of tracking you down. A good tip is to sit in the corner of the map, and just launch your attacks at the boss. The tornadoes will generally run into the walls, and while you might get hit once in a while, you’ll probably get hit less then if you actively try to dodge them.
If you have pretty good damage, you should be able to melt the boss down pretty quickly by sitting in that corner!
Red Owl Boss x2
The little owl boss from chapter one is back, and it has brought a friend along! Each time you drain one of their health bars, another couple will spawn until they get too small and eventually perish. AOE types abilities like Ricochet, Diagonal Arrow, and Bouncy Arrows are the best for this. Just try to avoid running into them, and they should go down relatively easily.
Big Purple Carnivorous Plant
This big guy will fire off some of those quick projectiles at you that you will need to quickly avoid. You’ll also want to keep moving, because he will launch forward at you and attempt to get in some melee damage. When he lands, he fires out four projectiles that come out from his front, back, left, and right! The key to this one is staying moving, because the projectiles are quite fast and you might not be used to the speed. The projectiles will also explode once they hit a wall, so make sure you stay pretty far away from them if you are near the walls! Another thing to watch out for is a little orange spark animation that is right under him. That means he’s about to launch at you, so make sure to start moving out of the way when you see it!
His final attack is similar to his small counterparts in that it shows three red beams that display where the attack is going. They are like diagonal arrows, so be ready to move in-between them depending on your position!